Database tables as SharePoint lists with Business Connectivity Service (BCS)
Let’s suppose that you want to use an external database table in a SharePoint-hosted App, here is how to achieve this !
This might seem a long process but the truth is that is quite easy.
We’ll have to create a WCF Data Service (OData Protocol) to expose our database. Then the next step is to deploy this Data Service somewhere to be accessible to the SharePoint-hosted App (e.g. on Microsoft Azure). Once that is done, you’ll be able to add an External Content Type (based on the Data Service previously deployed) in the SharePoint-hosted App (be careful, you can’t add an External Content Type to a Cloud-hosted App).
Let’s start by creating our Data Service (I’ll assume that you already have a database deployed somewhere).
First of all, create a new ASP.NET MVC 4 Web Application project (or any project that can hold an Entity Data Model and expose a WCF Data Service).
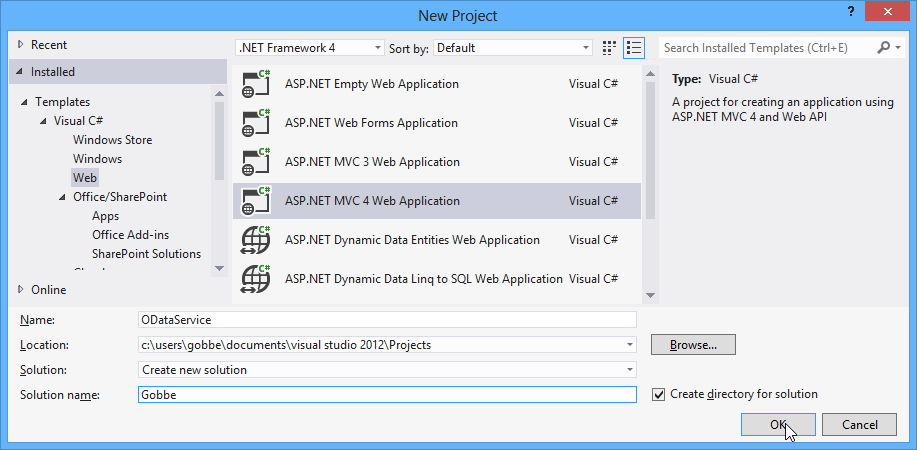
As the ASP.NET MVC 4 Application will be useless except for the Data Service, I’ll thus select the Empty template in the next dialog window.
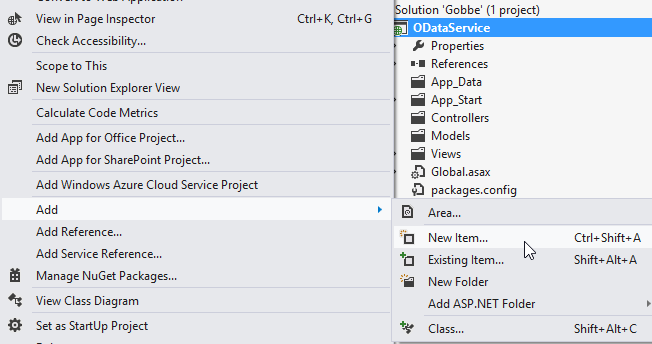
One the project is created, let’s add an Entity Data Model to it. Right click on the ODataService project, then select Add, then hit the New Item entry.
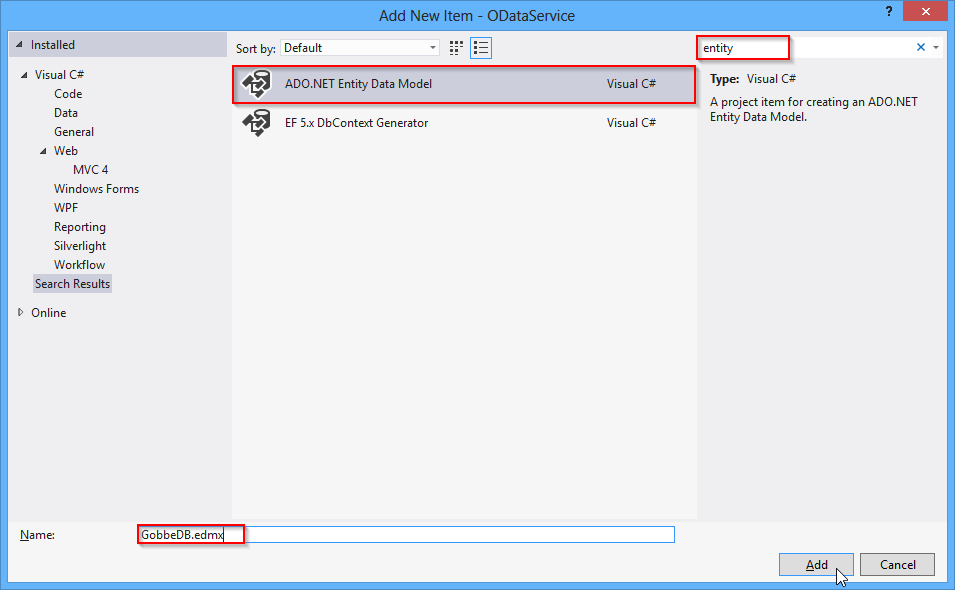
There, you’ll search for entity on the top right corner and select ADO.NET Entity Data Model.
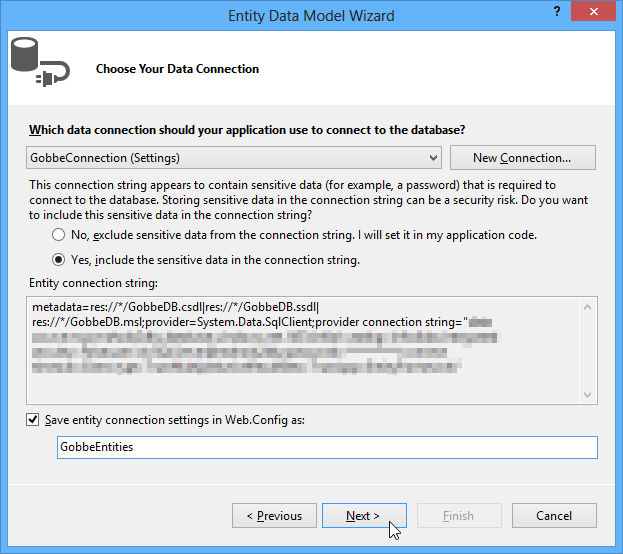
In the next window, select Generate from database, then create a new connection or use an existing one as below (I’ll use one hosted on Microsoft Azure for the purpose of this article).
You’ll arrive on a window allowing you to select which tables you want to include in your model. Just select thoses you want.
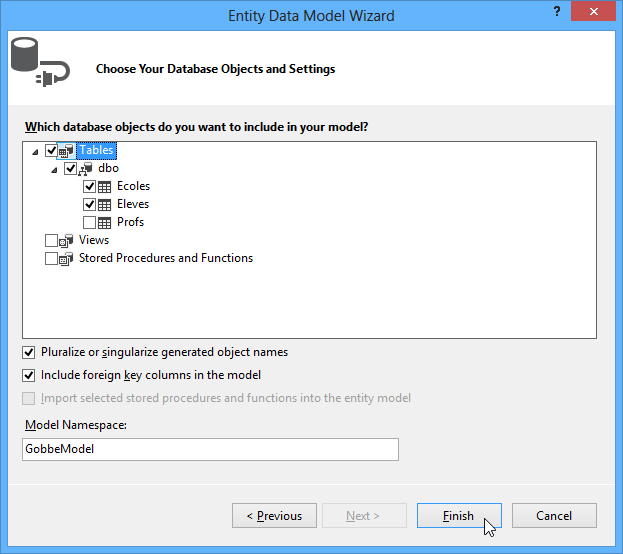
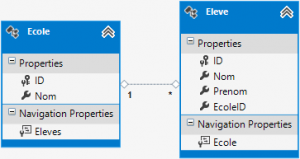
You’ll only have to hit the finish button to get your Data Model created (mine is below).
Now that we have our Data Model, we’ll add a new Data Service by right clicking on the ODataService project, then select Add, then hit the New Item entry (just as we did to add a new Entity Data Model previously).
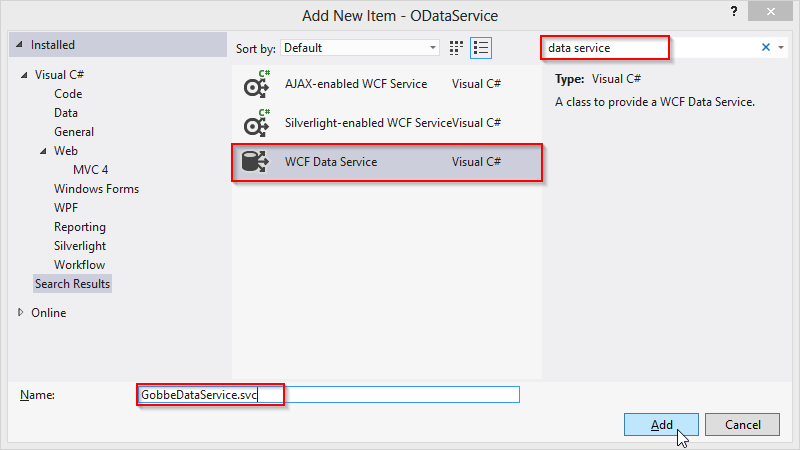
You should normally have a new DataService created which looks like this:
|
|
Let’s edit the TODO on the top of it to put our data source class name there. Mine is GobbeEntities.
public class GobbeDataService : DataService
And finally, let’s add some access rules on our entities with the config.SetEntitySetAccessRule() method. I’ll put all the rights on the entity Eleves, and only Read rights on the entity Ecoles
|
|
Now if you do a right click on the GobbeDataService.svc then you select View in Browser, it should open a window in your browser showing you a 404 error. That’s normal because ASP.NET MVC have routes and we’ll have to tell him to ignore routes finishing by .svc to make our Data Service available.
Open the file App_Start\RouteConfig.cs in your application and add the line 6 from the code below at the same place (before the MapRoute() call).
|
|
Now you can right click on your DataService (mine is GobbeDataService.svc) and select View in Browser, it should open a new page in your browser with XML content just like this:
|
|
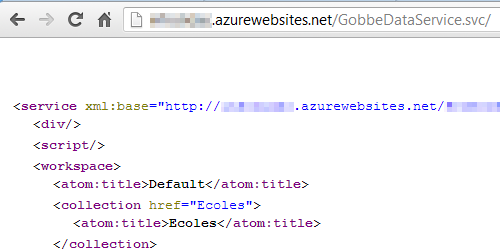
If it works, you can now publish it by right clicking on the ODataService project, then select Publish. Here I’ll publish it on a free Windows Azure Website. Once it is published, test it in your browser by typing the website URL suffixed by the Data Service file name (e.g. http://gobbe.azurewebsites.net/GobbeDataService.svc/ ). Here is the result expected.
If everything works fine, your database tables are now exposed through an OData Service which is accessible from everywhere on the Internet (maybe you should put some authentication if you put write rights as I do… but for this article we won’t do it), we can now start using it in our SharePoint-hosted App.
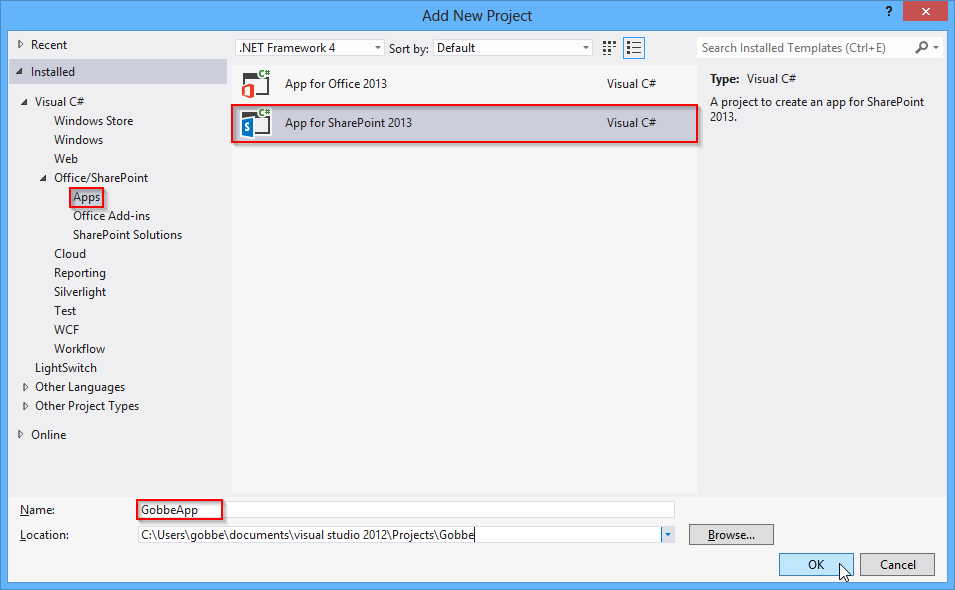
To achieve this, right click on the solution then go in the Add menu and select New Project…
In the New Project window, select the App for SharePoint 2013 template and name it (don’t forget to install the Microsoft Office Developer Tools otherwise you won’t be able to create an App for SharePoint 2013).
Then fill the next window like below (be sure to choose a SharePoint-hosted App) on the bottom.
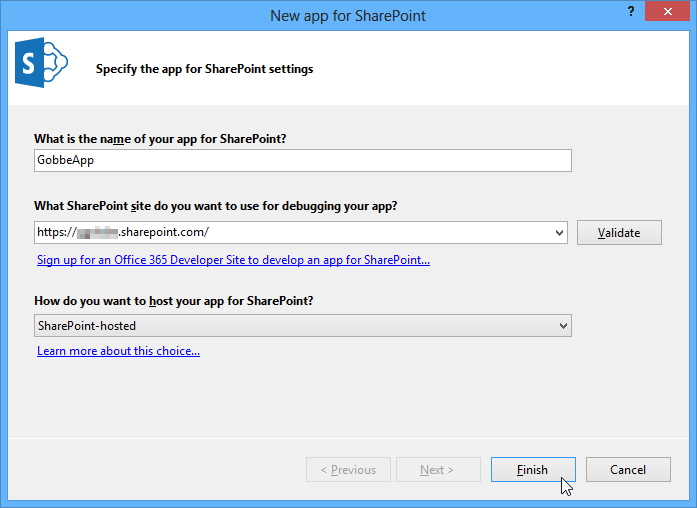
Wait a few moments and your SharePoint-hosted App should be created ! Next step is to right click on the SharePoint-hosted App project, then select the Add menu, and hit Content Types for an External Data Source.
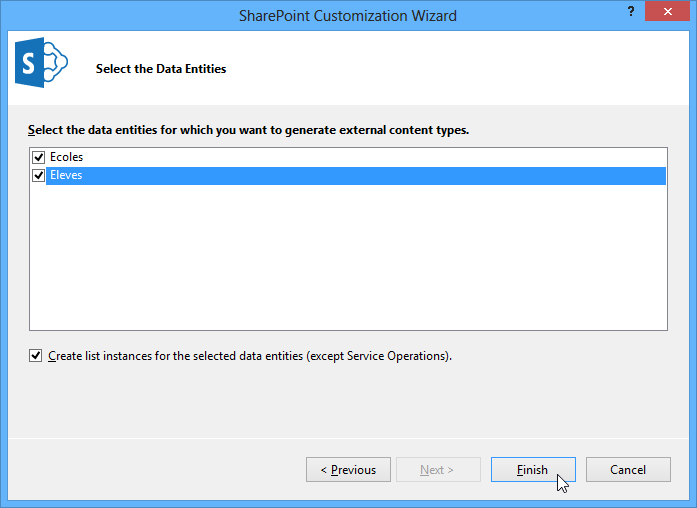
In the newly opened window, enter the address of the Data Service we just hosted!

In the next window, just select the tables for which you want to generate an external content type.
And it is done, you are now able to access your lists (which are actually tables from your database) from within your App (with JSOM or through the REST API, you can use the List.getByTitle access point and give your list name to it).
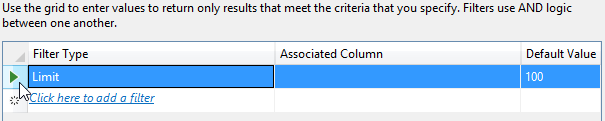
Just one more point, by default, there is a Limit filter on your External Content Types which limits the result set of queries made on the list to 100 results maximum. To remove it, open the .ect file in your SharePoint-hosted App project and in the filters list (on the bottom of the .ect file opened), click on the Limit filter, then right click on the green arrow on the left of the filter and hit the Delete action in the context menu.
I hope everything worked fine on your side, if you meet any problem during the set up of something, just leave a comment on this post and I’ll try to help you!